|
|
🦋 Tin-can Cello: staining and finishing
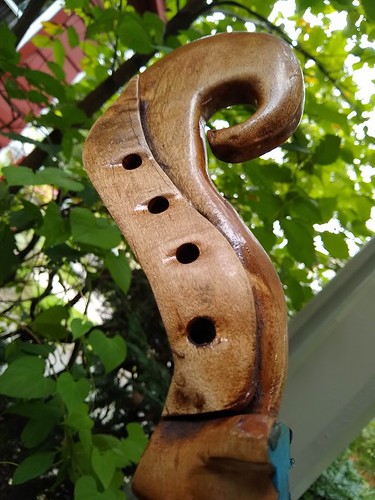
My shop time this weekend has been spent on putting the finishing touches on the neck of the Tin-can Cello. Since I last posted, in parallel with repairing the crack in the scroll, I've been putting stain on the different parts of the neck and buffing it out with steel wool-- I've been able to buff it to a very nice sheen. The pigments are pretty muted, with an antique look.
This weekend I was able to stain the scroll and put some coats of Tru-oil on. I will buff and sand the finish this week, and possibly put one more coat on.

I'm naming him Chelliphant! Finishing steps

- A coat of thinned Tru-oil (about 1 part turpentine, 2 parts finish) over the entire neck, scroll and dowel. (This is the last we will think of the dowel.)
- After about an hour (finish will not be completely dry), buff out with cloth.
- After another hour, wipe with turpentine and buff out with steel wool. (At this point finishing is complete for the upper portion of the neck, which attaches to the fingerboard.) Allow to dry overnight.
- The next day, apply several coats of Tru-oil, allowing about 2 hours between coats. Here we are only finishing the lower, curved part of the neck, the scroll, and the back of the washtub.
- After the fifth or so coat is dry, buff out finish with turpentine and steel wool and cloth.
- After a day or more of drying, sand the finish to 400, 600, 1000 grit and wipe down once more with turpentine.
posted afternoon of Sunday, September 23rd, 2018
➳ More posts about The Tin-can Cello
➳ More posts about Projects
➳ More posts about Luthery
➳ More posts about Woodworking
| |
|
Drop me a line! or, sign my Guestbook.
•
Check out Ellen's writing at Patch.com.
| |

