|
|
Monday, August 20th, 2018
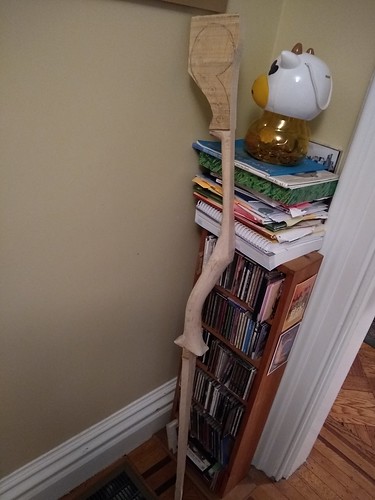
First weekend's progress: the neck is cut, and I've begun shaping it. (A key realization was that I'm going to need to get an angle grinder for cutting the metal tub, I ought to get it now so I can use it in shaping the neck. That cut many hours off of the time to shape the neck.) The upper surface is not precisely level or flat, and it is slightly wider than it needs to be. I'm going to spend my spare time over the next few days truing that up with rasp and scraper, and getting it to fit the fingerboard. Then I will work on the scroll and pegbox.
posted morning of August 20th, 2018: Respond
➳ More posts about Projects
|  |
Saturday, August 18th, 2018
well a drawing of a cello anyways. Next step, start cutting!
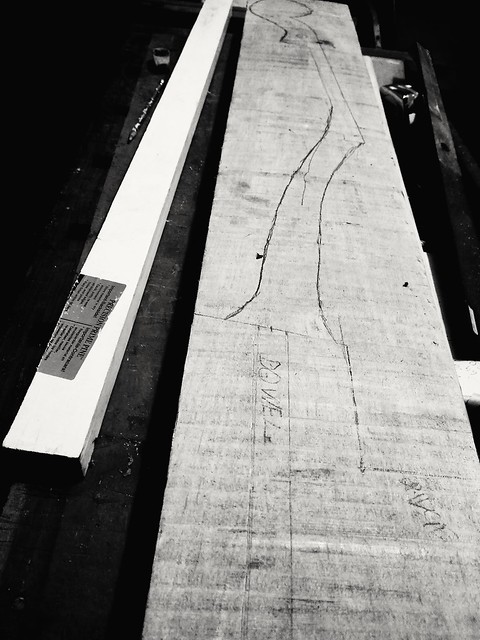
--well, the neck is a little off-center to the dowel. I think it will be stronger if it's centered.
posted afternoon of August 18th, 2018: 2 responses
|  |
Thursday, August 16th, 2018
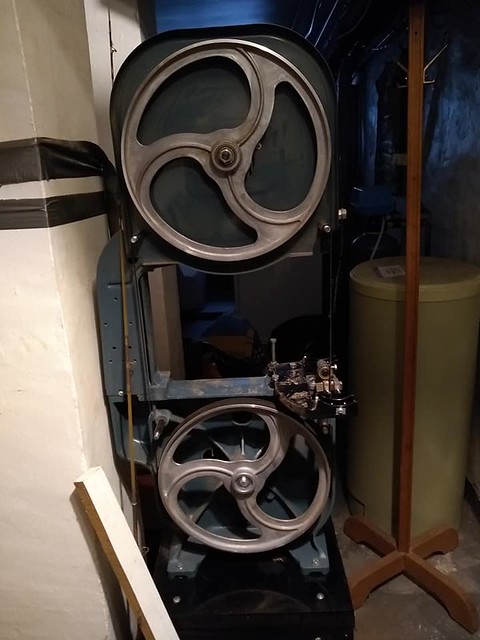
I'm looking forward to starting my cello project this weekend, and starting to get my shop in a little bit of order (anyway a marginally less chaotic state) and figure out where my tools are. I haven't done much woodworking to speak of since like 2007 at least! I'm really looking forward to having a well tuned up bandsaw, and to learning how to tune it up. This evening I found a box of rasps and files that I haven't seen in years :).
posted evening of August 16th, 2018: Respond
|  |
Tuesday, August 14th, 2018
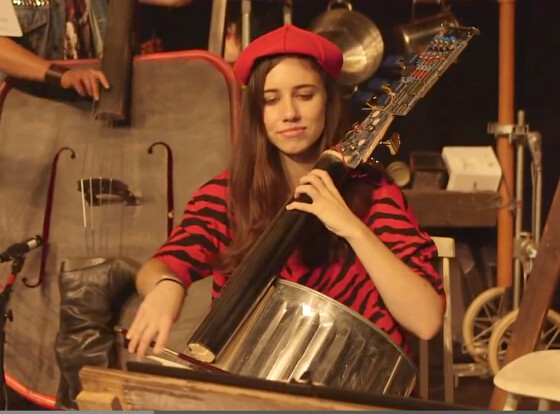
I've been looking around the web for a cello with a washtub body... Haven't found one yet quite like what I'm making, but there are a lot of different takes on the idea...
- A washtub cello with a plywood soundboard, seen at the 8th NYC Musical Saw Festival.
- A bucket cello made by Joe Rauen, with a long bridge connecting the strings to the back of the instrument.
- A tin can cello busking in France.
- A couple of washtub basses with strings and bridge, some with a soundboard added to the front of the tub, some using the back of the tub as soundboard.
- Paul Snider's junk orchestra includes the trashcan cello pictured above.
posted evening of August 14th, 2018: 4 responses
|  |
Monday, August 13th, 2018

A little bit of redesign that will make the neck cheaper, easier to build and more elegant -- all along I have been picturing the neck as running under the fingerboard up to the point where it hits the washtub. But it makes much more sense for the neck to come away from the fingerboard, similar to a traditional cello, with the fingerboard unsupported the lower half of its length.
This saves me some width for the neck blank, along with a good deal of thickness, and means there will be much less material to remove when I'm truing up the heel. The neck will also be stronger because there is more material in line with the dowel.
posted evening of August 13th, 2018: 2 responses
|  |
Sunday, August 12th, 2018
Work plan for building the Tin-can cello (this post is changing a bit, I'm just going to edit it inline; further edits in comments):
- Flatten bottom of neck: this will be the reference flat when cutting on the bandsaw. Plane entire length of board flat and straight. For reference, this is going to be parallel to the plane of the washtub's base. [note I never planed it flat, at all.]
- Mark up neck: draw outlines of the dowel and the neck on the board. Draw outline on the top of the board (i.e. opposite the side that was planed in step 1) and on one side. Use cardboard cut into shape of tub profile to determine where the dowel will go into the bucket.
- Cut around the outlines on bandsaw.
- Rough out dowel and neck. Finish dowel so it is straight and true. Mark up pegbox and scroll. Drill pilot holes for pegs.
- Mark entry for dowel on bucket. Cut open using angle grinder. Mark exit hole for dowel. Cut open.
- Fit dowel into bucket. True up heel.
- Finish shaping neck, carve pegbox and scroll. Attach nut and fingerboard to neck.
- Mount tailpiece; put A and C strings on, loose.
- Mark up and carve bridge.
- Set up cello.
posted evening of August 12th, 2018: 3 responses
➳ More posts about Luthery
|  |
|
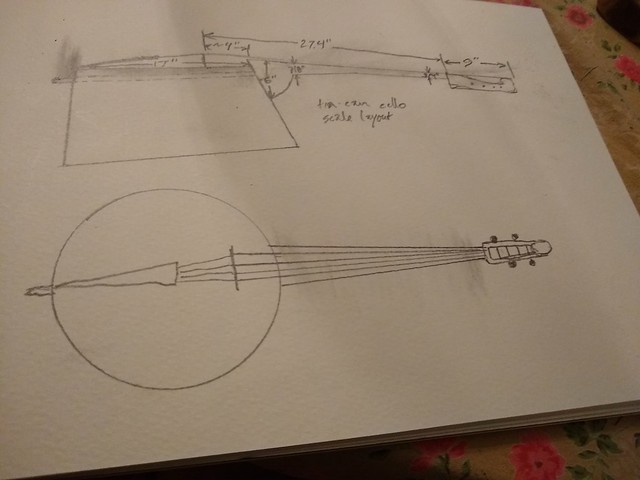
(Roughly to scale anyways). Some key measurements, as follows:
- Scale length (bridge to nut) 27.4"
- diameter of soundboard 17"
- bridge position to edge of soundboard ~4"
- length of peg box + scroll ~9"
- length of fingerboard 23 ⅜"
- height of tub 11"
- width of fingerboard at bridge end 2 ⅜"
I reckon the blank for the neck will need to be 10/4 hard maple, 6" wide*, 5' long. (Hope my bandsaw is up to the task! Derek is coming over in the near future to help with tuning it, and also to help with picking out wood...)
posted afternoon of August 12th, 2018: 7 responses
➳ More posts about Woodworking
|  |
|
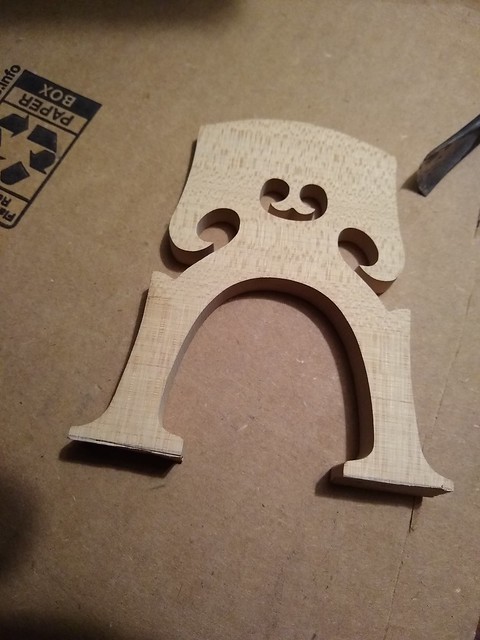
Two excellent resources for carving and setting up the bridge -- Fitting and Carving a New Cello Bridge at Triangle Strings lays it all out, Cello Bridge Carving at Jawmunji Fingerstyle Resources breaks down and simplifies a few
key points.
I bought a good quality Belgian-style bridge from Menzel and a template from Metropolitan. Won't do much work on it until the main work of building the instrument is done... I'm already starting to visualize where its contours will be.
. 
posted morning of August 12th, 2018: Respond
|  |
Wednesday, August 8th, 2018
So here is the idea: to build a cello, using as resonating chamber a washtub + a bass drum head. The construction of it will be on the principle of a gourd banjo; but with curved nut, fingerboard, and bridge. I am using an 11-gallon steel washtub, 20" across at its widest point; splurged and ordered it from Amazon -- consider this circular form the lower part of a cello body. The position of the bridge will be near the top of the soundboard, meaning the neck will need to be a bit longer than the the fingerboard* -- unlike a cello, which has a longer body. So the spot where you're bowing is at the top of the circular soundboard (the soundboard, i.e., the bottom of the washtub), midway between the end of the fingerboard and the bridge. The drum head is clamped in to the back of the body, to enclose the resonating chamber; and I'll cut a soundhole in the side of the tub. The instrument is in effect a bowed banjo-cello, with no soundpost -- a baritone rebab. I've got my fingers crossed that it will sound like anything :). I find it encouraging that a few experimental taps at the soundboard made the bucket ring like a bell!
First step is of course to have the washtub and cello components in hand, so I can mark it all out on cardboard. Local violin dealer Mo Menzel has very graciously offered to sell me a broken cello cheap, to use for parts, and I'm hoping she'll sell me a good bridge as well. In the next week or so, will swing by Board and Beam in Fairfield to pick up a hard maple board for the neck.
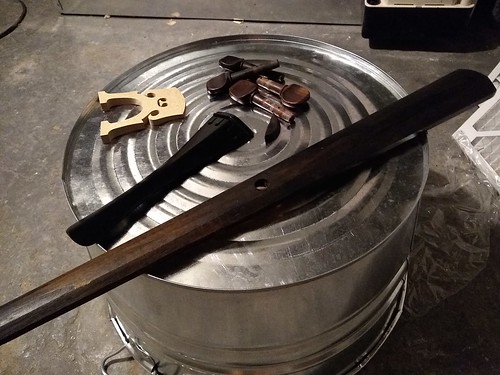
posted evening of August 8th, 2018: 1 response
| |
|
Drop me a line! or, sign my Guestbook.
•
Check out Ellen's writing at Patch.com.
| |
