|
|
Monday, March 11th, 2019
Following in the footsteps of Stefano Matteucci, a violin could be made using a small bodhrán for a body. Possibly tuned in a higher register than a violin, like an octave up from viola. You would want to minimize the angle of the strings crossing the bridge, to save undue pressure on the drum skin.
posted evening of March 11th, 2019: Respond
➳ More posts about Luthery
|  |
Friday, December 28th, 2018
The tin-can cello had a strong wolf tone when playing B, especially noticeable on the A string. Last night I fixed it with an improvised wolf tone eliminator:
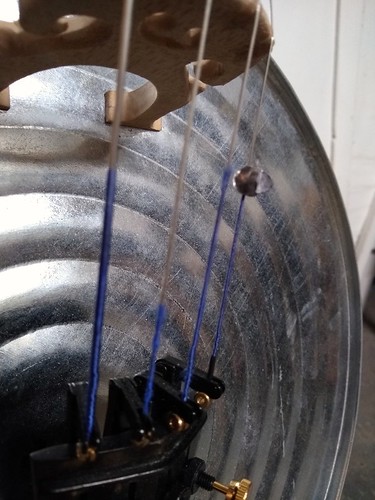
My thinking was that the wolf tone eliminators I've seen for sale are just a method of adding a little mass and damping to the afterlength of the string. I thought a fishing weight would do nicely and not have any moving parts to come loose. It works like a charm -- the B on the A string sounds clear and true, and it sounds fine on other strings as well though there is not as much of a stark difference... I don't hear wolf tone anywhere else.
posted morning of December 28th, 2018: Respond
➳ More posts about Projects
|  |
Sunday, December 16th, 2018
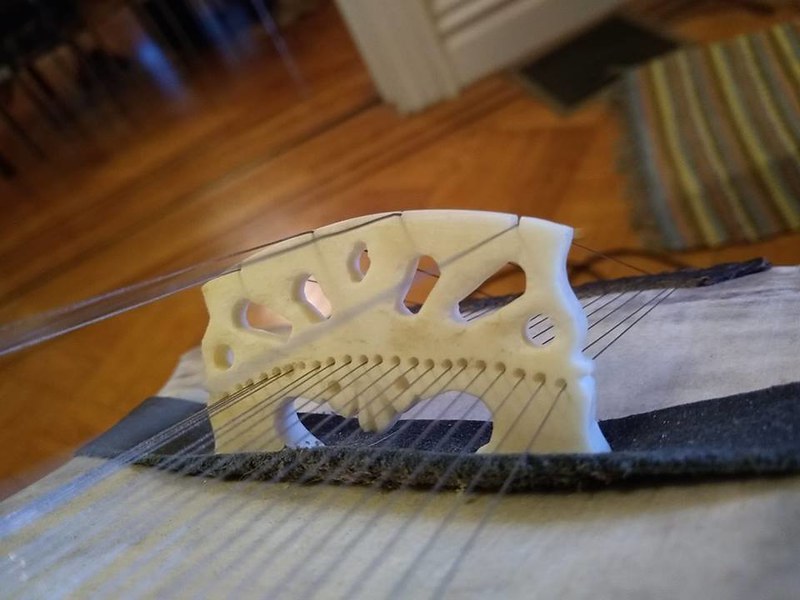
A dilruba could be built with a gourd body. (note Not nearly enough tension to support a washtub construction, though.) The neck might be cherry -- the shape of it seems pretty easy to build, much much simpler than a sitar neck. (I am thinking here that the neck is not hollow, I'll need to check that.) Friction pegs for the tarif strings could easily be let in to the side of the neck with the string winding on the outside. The bridge will be maple and the nut cocobolo. Or a cocobolo bridge even! That could be made pretty thin.
posted afternoon of December 16th, 2018: 1 response
➳ More posts about Music
|  |
Saturday, December 15th, 2018
posted afternoon of December 15th, 2018: Respond
|  |
Tuesday, November 27th, 2018
Over the course of building the tin-can cello, I've searched around a few times for precursors [1, 2]. I've been a bit surprised at how few examples of an instrument with a metal soundboard I've been able to find! Here are some projects I've had in mind recently:
- The tin-can cello. This is the project most of my blogging has been about recently, a cello with a washtub body, with the base of the tub as soundboard.
- A 4-stringed viola da gamba sort of instrument with a wok (bronze) as its soundboard and an arched maple back, and steel strings. I'm not really sure yet of what the scale length will be or what gauge of strings I'll be using. I'm thinking the strings will be tuned to E, A, D, G but I don't know in what octave.
- A banjo-style instrument with a cymbal as its soundboard.
- A violin made from pounded-out sheet metal (with a wooden neck/scroll/fingerboard). If bronze can be found in sheet form and is strong enough, I'd like to use it. Otherwise steel. [Looks like sheet bronze, brass, and steel can be had from onlinemetals.com]
- A (high-tin) bronze urn or vase or bowl (singing bowl?) or bucket, fitted with a wooden neck and bridge, and strings.
- An erhu with a coffee can resonator.
- A violin (or soprano violin?) with a cookie tin resonator.
- A contrabass with a bell as its resonating chamber.
posted evening of November 27th, 2018: 2 responses
➳ More posts about The Tin-can Cello
|  |
Monday, October 29th, 2018
Looks like I will not need a jeweler's saw, just the drill press and files are working fine.
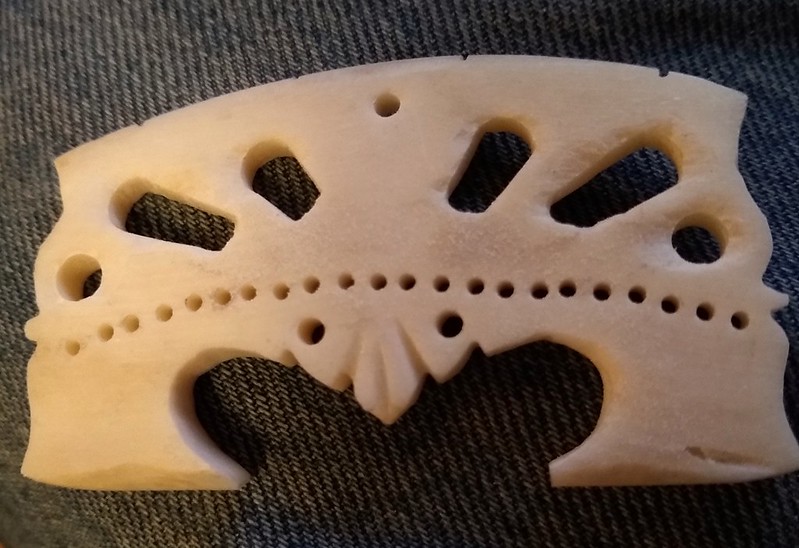
posted morning of October 29th, 2018: Respond
|  |
Sunday, October 28th, 2018
I am following (loosely) the plan David Courtney writes about at Chandrakantha.com for setting up a dilruba bridge.
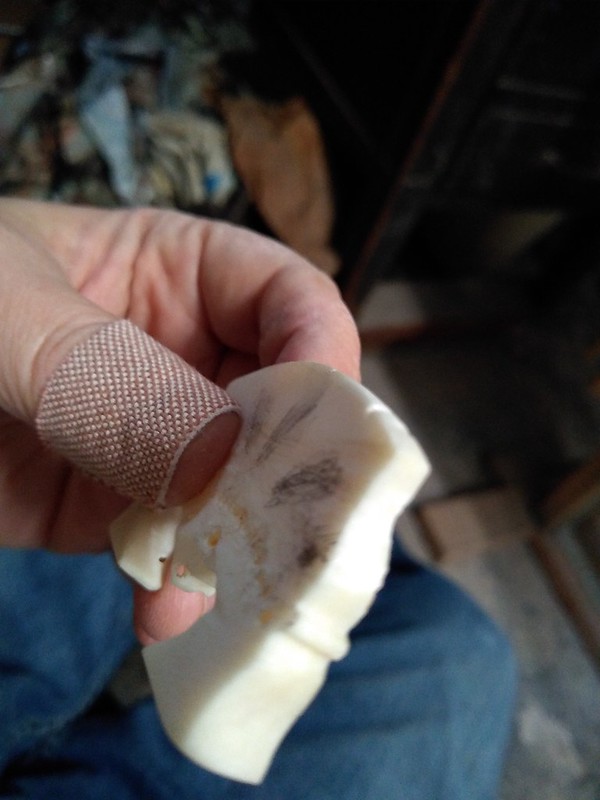
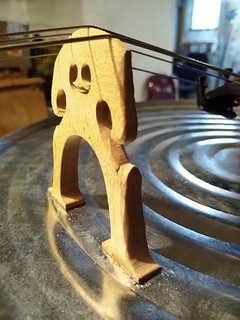
The idea is to keep the rigidity of the shape but open up its structure, to reduce mass. I'll cut the marked areas away using a combination of drill press and fret saw (the latter of which I'll need to find, and acquire a jeweler's blade).
posted morning of October 28th, 2018: Respond
|  |
Saturday, October 20th, 2018
I mean I'm sure I'll be doing bits of setup here and there for months. But for all intents and purposes. Here's what it sounds like... pardon the atrocious playing :), I've just now contacted a local cello teacher!
It's funny, because my original estimate for best-case when I might finish the cello was "end of September". Not bad considering! This whole project has taken like 4 months from conception to execution.
 Update from Sunday morning: wow! The instrument stayed nearly in tune overnight! First time that has happened. A couple of things to be done this morning: I forgot to put parchment on the bridge for the A and D strings; I want to re-drill the string holes in the pegs; some of the pegs need a little more peg dope. I ordered fine tuners.
posted afternoon of October 20th, 2018: Respond
|  |
Sunday, September 23rd, 2018
The tools I have found the most useful in the course of building the Tin-can Cello:
- bandsaw. This project would have been just about unthinkable without a bandsaw.
- angle grinder. Has been an invaluable time-saver and has made a fair amount of shaping possible that I would never have started on otherwise.
- dragon rasp. Just a great, great hand tool.
- sanding blocks: Wow. In the course of my woodworking avocation to date, I don't believe I've ever glued sandpaper to wooden blocks. Certainly not the amount I'm doing in this project. It is a wonderful thing!
- scrapers (especially the french curve shape)
posted evening of September 23rd, 2018: 1 response
|  |
|
My shop time this weekend has been spent on putting the finishing touches on the neck of the Tin-can Cello. Since I last posted, in parallel with repairing the crack in the scroll, I've been putting stain on the different parts of the neck and buffing it out with steel wool-- I've been able to buff it to a very nice sheen. The pigments are pretty muted, with an antique look.
This weekend I was able to stain the scroll and put some coats of Tru-oil on. I will buff and sand the finish this week, and possibly put one more coat on.
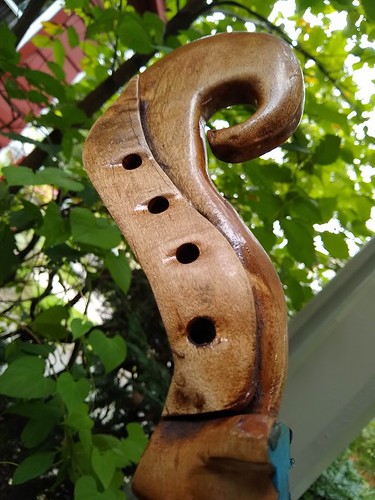
I'm naming him Chelliphant! Finishing steps

- A coat of thinned Tru-oil (about 1 part turpentine, 2 parts finish) over the entire neck, scroll and dowel. (This is the last we will think of the dowel.)
- After about an hour (finish will not be completely dry), buff out with cloth.
- After another hour, wipe with turpentine and buff out with steel wool. (At this point finishing is complete for the upper portion of the neck, which attaches to the fingerboard.) Allow to dry overnight.
- The next day, apply several coats of Tru-oil, allowing about 2 hours between coats. Here we are only finishing the lower, curved part of the neck, the scroll, and the back of the washtub.
- After the fifth or so coat is dry, buff out finish with turpentine and steel wool and cloth.
- After a day or more of drying, sand the finish to 400, 600, 1000 grit and wipe down once more with turpentine.
↻...done
posted afternoon of September 23rd, 2018: Respond
| Previous posts about Woodworking
Archives  | |
|
Drop me a line! or, sign my Guestbook.
•
Check out Ellen's writing at Patch.com.
| |

