|
|
Sunday, August 26th, 2018
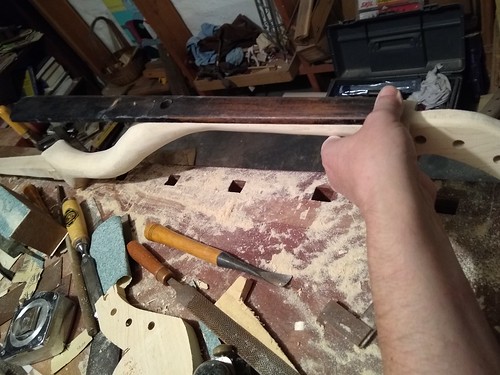
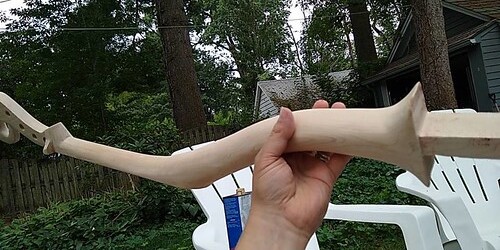
The parts of the tin-can cello's body (excluding the bucket and all of the components; just talking about the wooden body pictured above) are as follows, from top to bottom, with rough length of each part:
- Scroll and pegbox (9")
- Neck (the part the fingerboard attaches to) (13")
- Curve (11 ½")
- Dowel (27")
I have been working this afternoon on finalizing the curved portion of the neck. I noticed last night, running my hand along the curve, that there were some bulges and hollows -- this afternoon I've been endeavoring to smooth that out, using the rasp I bought from StewMac, which I must say is one of the nicest hand tools I've encountered. Then I went over it with 80-grit sandpaper, and it's looking nice. I think I'm about to the point with Scroll, Neck and Curve, that I can start sanding with finer grits.
The curve has been interesting because I have no template whatsoever for it. I layed out the position of the upper neck using the fingerboard as a reference, and then I layed out the curve based on what I thought would look nice and would be strong.
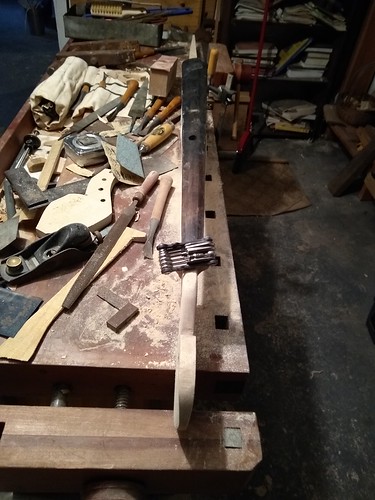
Getting the upper portion of the neck straight and flat has been a while coming. I did a bad job of roughing it out on the bandsaw; I did not tighten the table trunnions sufficiently before I started, and the table moved out of square slightly. So the surface of it was skew. I wasn't able to get much of anywhere squaring it with jointer plane, in part because the scroll rises above the plane of the neck (nonstandard) and in part because the wood is so hard it's just very difficult to plane. I ended up flattening the surface with rasp and coarse sandpaper, checking my progress as I went against the fingerboard that I'll be gluing on there; and it took a while. But I reckon it is right, now; when I lay the fingerboard on there it lies flat and I can sight straight along it to the point of the dowel. Next I will sand it with 100- and 120-grit, to prepare for gluing. I won't glue the fingerboard on until after I have fit the body into the bucket.
posted afternoon of August 26th, 2018: Respond
➳ More posts about Projects
|  |
|
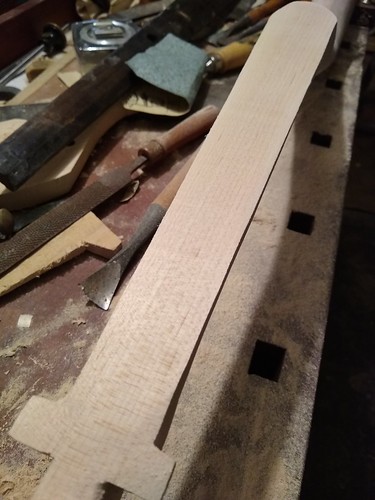
This hard maple is making me understand flatness in a whole new way. I'm not sure I've ever properly flattened a board. I'm not sure if other woods than maple can even get this flat!
posted afternoon of August 26th, 2018: Respond
|  |
Saturday, September first, 2018
The cello's neck is for the most part (excluding the very bottom, next to where it will meet the bucket) sanded smooth to 80 grit. The dowel is straight. Today I am looking to do the rough fit to the bucket; assuming (fingers crossed!) this works, I'll be refining the fit over the weekend, and then: - Finish sanding the neck and scroll, to 320 grit.
- Color the neck and scroll.
- Finish the neck, scroll, and dowel.
- Glue up the fingerboard and nut.
- ...Setup time!
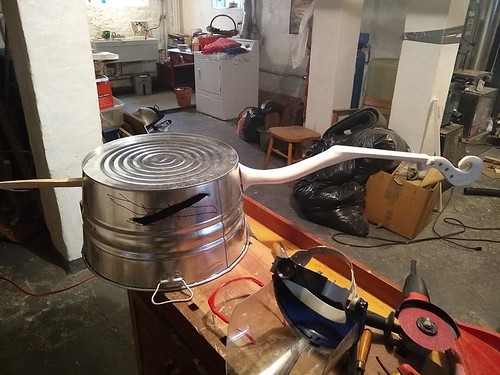
I've started marking up the bucket.
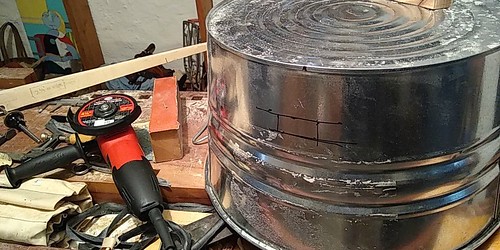
 ...et voici! Rough cut:
posted morning of September first, 2018: Respond
|  |
Sunday, September second, 2018
The fit of the neck into the bucket is... good enough at this point. I'm going to spend today smoothing -- the edges of the soundhole needs some attention, and the whole neck and scroll needs to be sanded to 320 grit. (I am going to leave the dowel rough, including the bit of it that's exposed.) Then it's time to color the cello!
I'm flying a bit blind when it comes to pigment. Have been looking around the web, there's a lot of conversation about coloring violins at The Pegbox and a couple of other forums. What I'm going to try first (on a piece of scrap maple), is mixing dry pigment with turpentine (or possibly lavender oil) and applying that to the sanded wood, and then finishing over that with multiple coats of thinned Tru-oil, possibly mixing some pigment into the early coats of Tru-oil as well. I'll avoid rushing, planning to spend a week or more working on test pieces.
The color scheme I'm going for is: a mix of burnt sienna and orange on the lower, curved portion of the neck, deepening to burnt umber as it approaches the bucket; burnt umber on the tailpin; raw umber on the straight part of the neck; burnt sienna on the pegbox and scroll, deepening to burnt umber at the center of the scroll.
posted morning of September second, 2018: 1 response
|  |
|
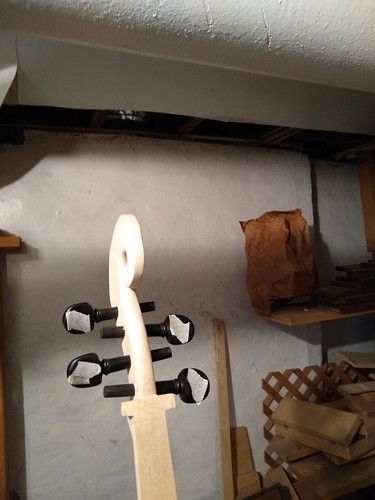
Well... the pilot holes for the pegs were square, I'm sure of that... the skewness of the peg holes alarmed me at first but I'm growing to like it. Each peg is skewed slightly to the back and slightly up. This means the string is going to come off of the peg pulling it a little off square. I'm not sure what effect this will have and I think the tuners will still work... Taking for granted that they will function, I kind of like the effect visually. So I'm tentatively going to claim that I meant for it to look this way. It's a feature of the lateral pegbox!
posted afternoon of September second, 2018: Respond
|  |
Monday, September third, 2018
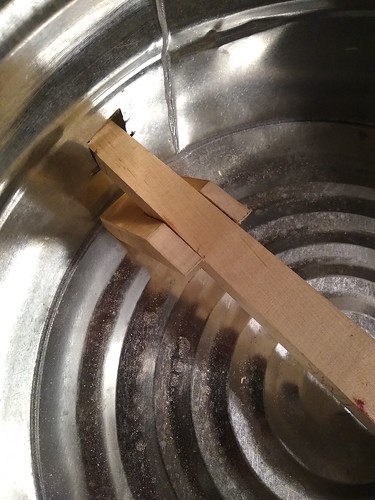
Since I started designing the tin-can cello, I've been going back and forth about whether (and how) to add bracing material. It's a washtub! I would think, Designed to hold hundreds of pounds of water without deforming! Well, sure, but the stress from the cello strings will be in a different direction...
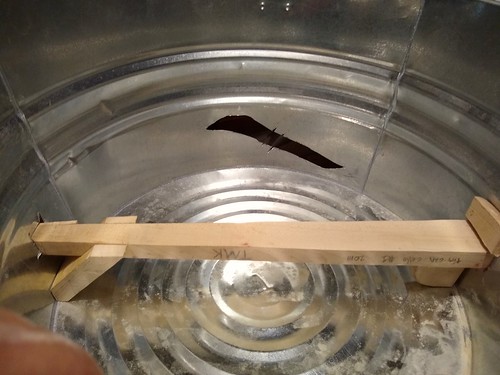
This morning I think I figured it out. I added two pieces of bracing wood, one on each end of the dowel. The tail end brace, pictured above, locks into the dowel's taper, and is very stable -- this corner is where just about all the stress on the bucket will be, it's where the tailpiece butts up against the bucket. The head end brace is just a square of wood tucked between the dowel and the rim of the soundboard, meant to keep the side of the bucket from buckling.
posted afternoon of September third, 2018: Respond
|  |
|
Somehow I've had in mind for a while that I would rub pigment dissolved in turpentine on the cello neck to color it, and then finish over that with varnish. But now that I think about it it would be better to use the varnish as a base and add the dissolved pigment to the varnish.
My plan is to put a coat of clear varnish over the whole neck and scroll, and let that dry for a few days, then sand to 600 grit, and do a second coat with colors-- adding pigment as I move down the neck and to the scroll. After that dries, I will sand again and do a third coat, either with or without pigment. Maybe a fourth, clear? I will see how it looks after the third coat and sanding.
posted afternoon of September third, 2018: 2 responses
|  |
Tuesday, September 4th, 2018
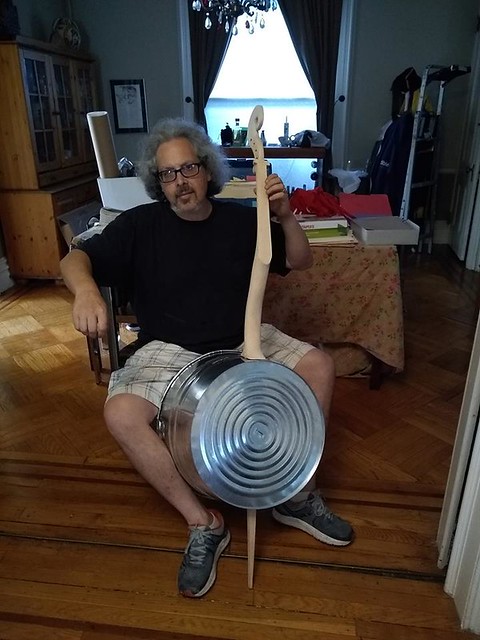
Two milestones this weekend in work on the Tin-can Cello: one quite visible, one hidden. Getting the neck into the bucket, and having it fit and look like what I was expecting, obviously huge; and figuring out how to brace the body is huge, and makes it way more likely that this will end up a playable instrument.
posted afternoon of September 4th, 2018: Respond
|  |
Saturday, September 8th, 2018
My tin-can cello is becoming a real thing... three major things left to do are
- Finish the neck and scroll: I will disassemble it for this; waiting on delivery of a bottle of varnish and of a UV lamp to help the varnish dry. (I'm going to leave it with the neck and body put together and the various braces in place for the time being, and just go downstairs every couple of hours to crow over it :), until the varnish arrives.)
- glue up the fingerboard and nut. This will need to wait until the process of finishing is complete.
- set up the backing skin for the body. I'm waiting on delivery of a 20" bass drumhead, and need to buy some steel braces that I will bend to shape. (Or wait, no, maybe I will cut supports for the drumhead out of maple.) Update, the drumhead idea is a mistake. I will cut a back out of ¼" plywood.
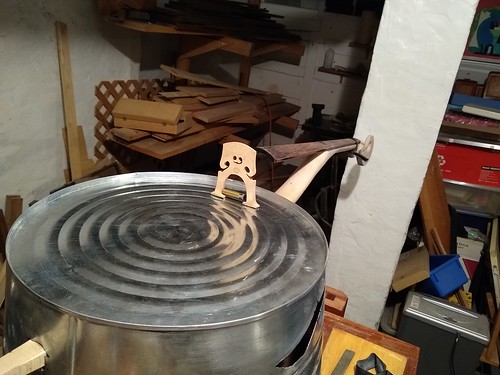
And then I can start on the setup! (Oh one other thing I'm waiting on delivery of, is a tailcord. And I have not purchased any strings yet.) Setup entails:
 - Putting the tailpiece on.
- Carving the feet of the bridge.
- Putting on A and C strings.
- Calculating height of bridge. (Leave ⅛" to account for deflection of the soundboard!)
- Carving top of bridge.
- Putting on all four strings to check tension, height, and spread of bridge feet; correcting if necessary. Adjusting slots in nut.
- Carving bridge in thickness and chamfer.
- Final stringing.
- First playing!
I am hoping to broadcast live video of the final stringing and first notes of the instrument! Fingers crossed!
↻...done
posted afternoon of September 8th, 2018: Respond
|  |
|
I sent away for a book of duets by Bach for (Stroh!) violin and (Tin-can!) cello... Guess that's gonna mean taking lessons at some point...
posted afternoon of September 8th, 2018: Respond
| More posts about The Tin-can Cello
Archives  | |
|
Drop me a line! or, sign my Guestbook.
•
Check out Ellen's writing at Patch.com.
| |
