|
|
🦋 Tin-can Cello: the lateral pegbox
I've been fretting about carving the pegbox on my cello... Today I had an idea for how to hugely simplify the process. I can't swear it is a good idea, but I went ahead and acted on it. Won't know until setup time if it's a boon or a bust.
The lateral* pegbox
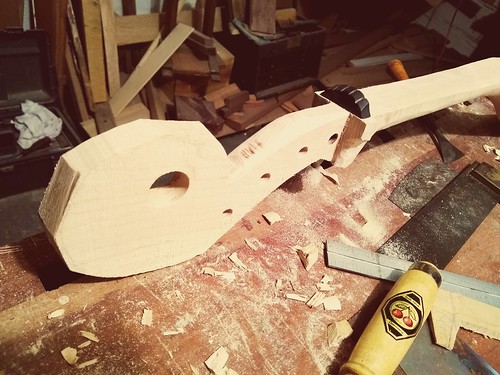
So the idea is, instead of having two ⅜" cheeks for the peg to enter and exit, with the string winding in the middle, there is just a central fin ¾" wide. Pegs enter from alternating sides; the string winds on the opposite side to where the peg enters.
 The good
It looks kind of cool; it's original; it's way simpler to make. Also: if I ever wanted to switch to 5 strings, easy to drill another peghole.
The bad
I'm not certain about the physics here. In a traditional pegbox, the stress on the string is in between two points of support; here, the stress will be supported on one side only. This may break the peg, I'm not sure how strong they are. We'll see! If I'm wrong and it does not work, I'll need to carve a new pegbox and scroll, and graft it onto the neck. (Or as Jeff points out, if the pegs don't work I could try using bass viol tuning machines as a fallback option.)
but
Here's why I'm sort of confident about the peg holding up: if the string is wound properly, the stress on the peg will be right next to where it emerges from the supporting wood. This seems like a pretty strong load-bearing point.
*(and note)
Not a huge amount of thought went into the nomenclature. If you've got a more descriptive adjective for this than "lateral", please let me know.
posted evening of Tuesday, August 21st, 2018
➳ More posts about The Tin-can Cello
➳ More posts about Projects
➳ More posts about Luthery
➳ More posts about Woodworking

posted evening of August 22nd, 2018 by Jeremy Osner

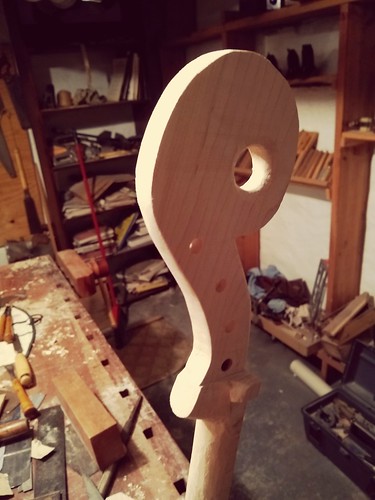
Next steps: - Truly flat fingerboard.
- Fit neck into bucket.
- Finalize position of nut.
- Trim fingerboard portion of neck to fit, and sand out curves.
- Glue up fingerboard and nut.
posted morning of August 23rd, 2018 by Jeremy Osner
| |
|
Drop me a line! or, sign my Guestbook.
•
Check out Ellen's writing at Patch.com.
| |